Automatic Caption Generator in Python
Using MoviePy
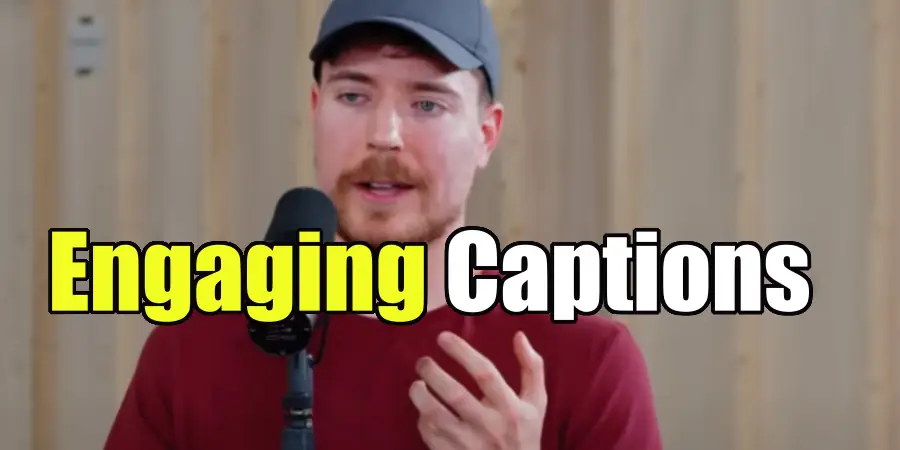
All of those "influencer speech with Subway Surfers gampeplay" videos can benefit from subtitles.
The Story
I was in my junior year, and I was pushing a lot of short form video content out to various platforms. I was just trying some new things, trying to establish an online legacy.
I was trying harder and harder to get more viral videos. I was studying all areas of content creation, especially retention. I was working on creating captions to make the video more engaging, but I found that it was a lot of work to manually type them all out and time it just right.
So, instead of typing out my captions, I spent two months of afterschool work on an enormous python project. It was technically not worth the time, at all, but it was still fun and gave me a lot of experience in hacking something together.
Plus, even if this tool didn't save me time, maybe it can save somebody else a little bit of hassle :)
How to set it up
Using this requires you to download a few new libraries, but they should be a quick install.
Source code
First, download the source code-
When you open this later, make sure to open the entire "release_1" folder in Visual Studio Code, so that main.py is able to access the other files.
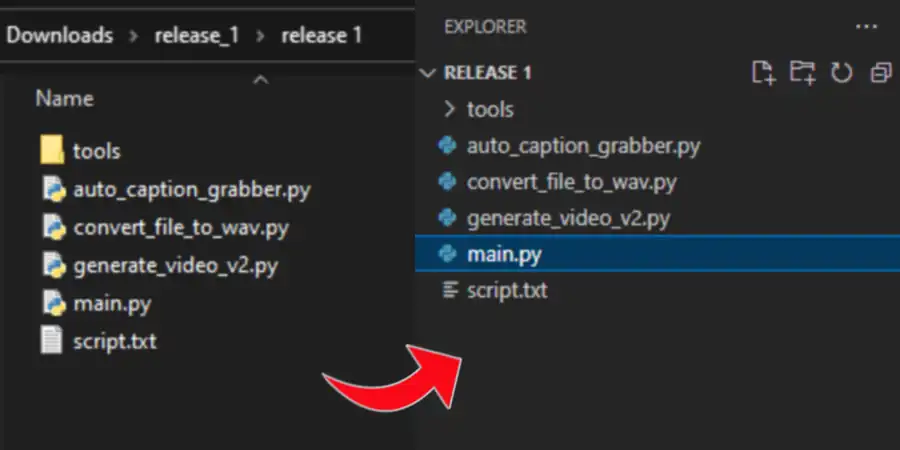
main.py is the only file you actually have to run. Opening it with python isn't good enough because then the other files don't get included properly, so you should open the entire folder in VS Code.
Required libraries
There's 3 quick libraries I used in this project
pip install moviepy
This just installs moviepy. It's kind of a requirement.
pip install SpeechRecognition
In order to actually use the speech recognition, you have to also download the API's. I have the script set up to use either Google's api, or Spynx. Neither are very good, so I'm not actually going to show you how to use them. I will show how to import YouTube captions instead. View the SpeechRecognition project here
pip install pymediainfo
This is just a library that helps identify file metadata. It's handy for the .wav file extraction.
ImageMagick
Most MoviePy projects require ImageMagick to work. You can download it here . Make sure to Install Legacy Utilities.
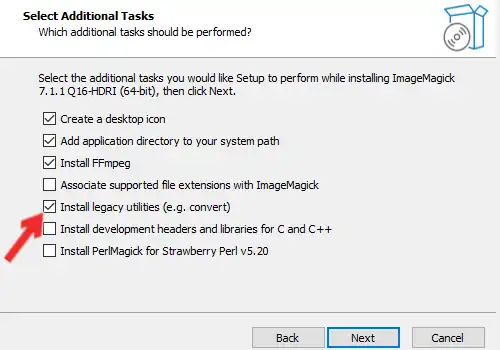
Legacy Utilities includes convert.exe, which is a program that MoviePy requires.
How to use it
Get a video
First, get a video where you are speaking. Here is an example one you can use.
Upload it to YouTube and set the language to English so that it can auto-generate captions. YouTube's caption generator is for superior to the speech recognition that I put into the script, so that's why we're using it.
Extract the captions
If you turn on subtitles on the video, you can see they got everything almost perfectly.
Use on online tool like this one to download the subtitle data.
Pro tip:
when entering a Shorts url, replace the
shorts/
with
watch?v=
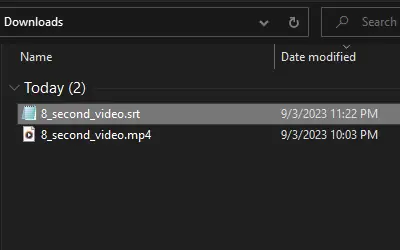
Download the SRT subtitles file.
Modify the SRT file
Before importing the file into the caption generator, we have to format it correctly. This is because I designed the script to work with a specific caption format, and then I switched to something else. So I created a tool to automatically format it back to what it should be.
First, rename the file so that there are no spaces in it. Additionally, you should open it and remove all the whitespace at the end of the file.
Now, in the folder you downloaded with all the source code, there should also be a folder called "tools." Go there and locate
remove_numbers_from_subs_file.py
. Run the file with VS Code. You should be able to open the SRT file and it should
spit out a new text file.
If you have any troubles with this part, then feel free to modify the code to work for you. The new file just has to look like this:
            00:00:00.260 --> 00:00:05.779
            hi my name is Angus and this is my cat

            00:00:03.500 --> 00:00:07.339
            if you're looking for something to do in

            00:00:05.779 --> 00:00:10.480
            your free time then you should go and

            00:00:07.339 --> 00:00:10.480
            learn Esperanto
Make sure there is No Witespace at the end of the file
Run the program
As mentioned before, all you have to do to officially run this thing is open the folder in VS Code. Click on main.py and hit "start debugging."
Let's go through some of the prompts, shall we?
Open the file you want to generate captions for.
Do you wish to generate captions?
yes
Generate captions with speech recognition?
No. Unless you set it up and you really want to use it, just import the captions we just made.
Now open up the captions file. The file dialogue may appear behind the VS Code window.
Do you want to adjust some caption generator settings?
No. Most of it only applies to the speech recognition stuff anyways.
A script has just been made in this applications directory....
class="answer"This is the variant of the subtitles where we can see the final captions, timings, colors, and emphasized words.
Go to the source code folder you downloaded and open script.txt. First, spell my name correctly.
Change
["Angus and this ", 1.1, 2.1, "white", "", "red"]
to
["Aengus and this ", 1.1, 2.1, "white", "", "red"]
Now let's emphasize Esperanto, because it's cool.
Change
["learn Esperanto ", 7.0, 10.2, "white", "", "red"]
to
["learn Esperanto ", 7.0, 10.2, "white", "Esperanto", "green"]
go back to the command prompts and hit y to finish making changes
Do you want to adjust some video generation settings?
Yes. Let's adjust a few.
each chunk (line in script.txt) is split into lines. each line can only contain x words.
Adjust this if you want more or less words on the screen. Otherwise hit 2.
You can adjust the text to be further up or down.
I don't remember why this happened, but a manual adjustment of the text positioning was usually needed. Hit 70 unless it's too low/high.
What font size?
Hit like 70 or something, depending on how large the video is
Lines are seperated by a factor of x.
hit 1, unless you want to squeeze them together.
Do you want the text to have an outline?
No.
The text can expand quickly to make it more flashy.
Hit yes. It took me forever to implement this feature.
How long should text expand for?
0.05. The longer it is, the more noticeable it is.
How long should the subtitles be delayed for?
This is useful for when the subtitles are just kinda off because you grabbed them from the middle of a video. Hit 0.
Your video should start generating! It should look something like this.
Conclusion
After you've created your video, feel free to go back and adjust any parameters you feel necessary.
I also encourage you to tinker with the code on your own to see what you can do with it!
Even though this was technically very inefficient for me to make, I still had a lot of fun creating it. Plus, I love supporting an awesome project like MoviePy.
If you have any questions about how this works, you can email me. I understand that this program is a bit of a behemoth and kind of complicated.
Have fun!